Pear tree (Pyrus communis)
설명
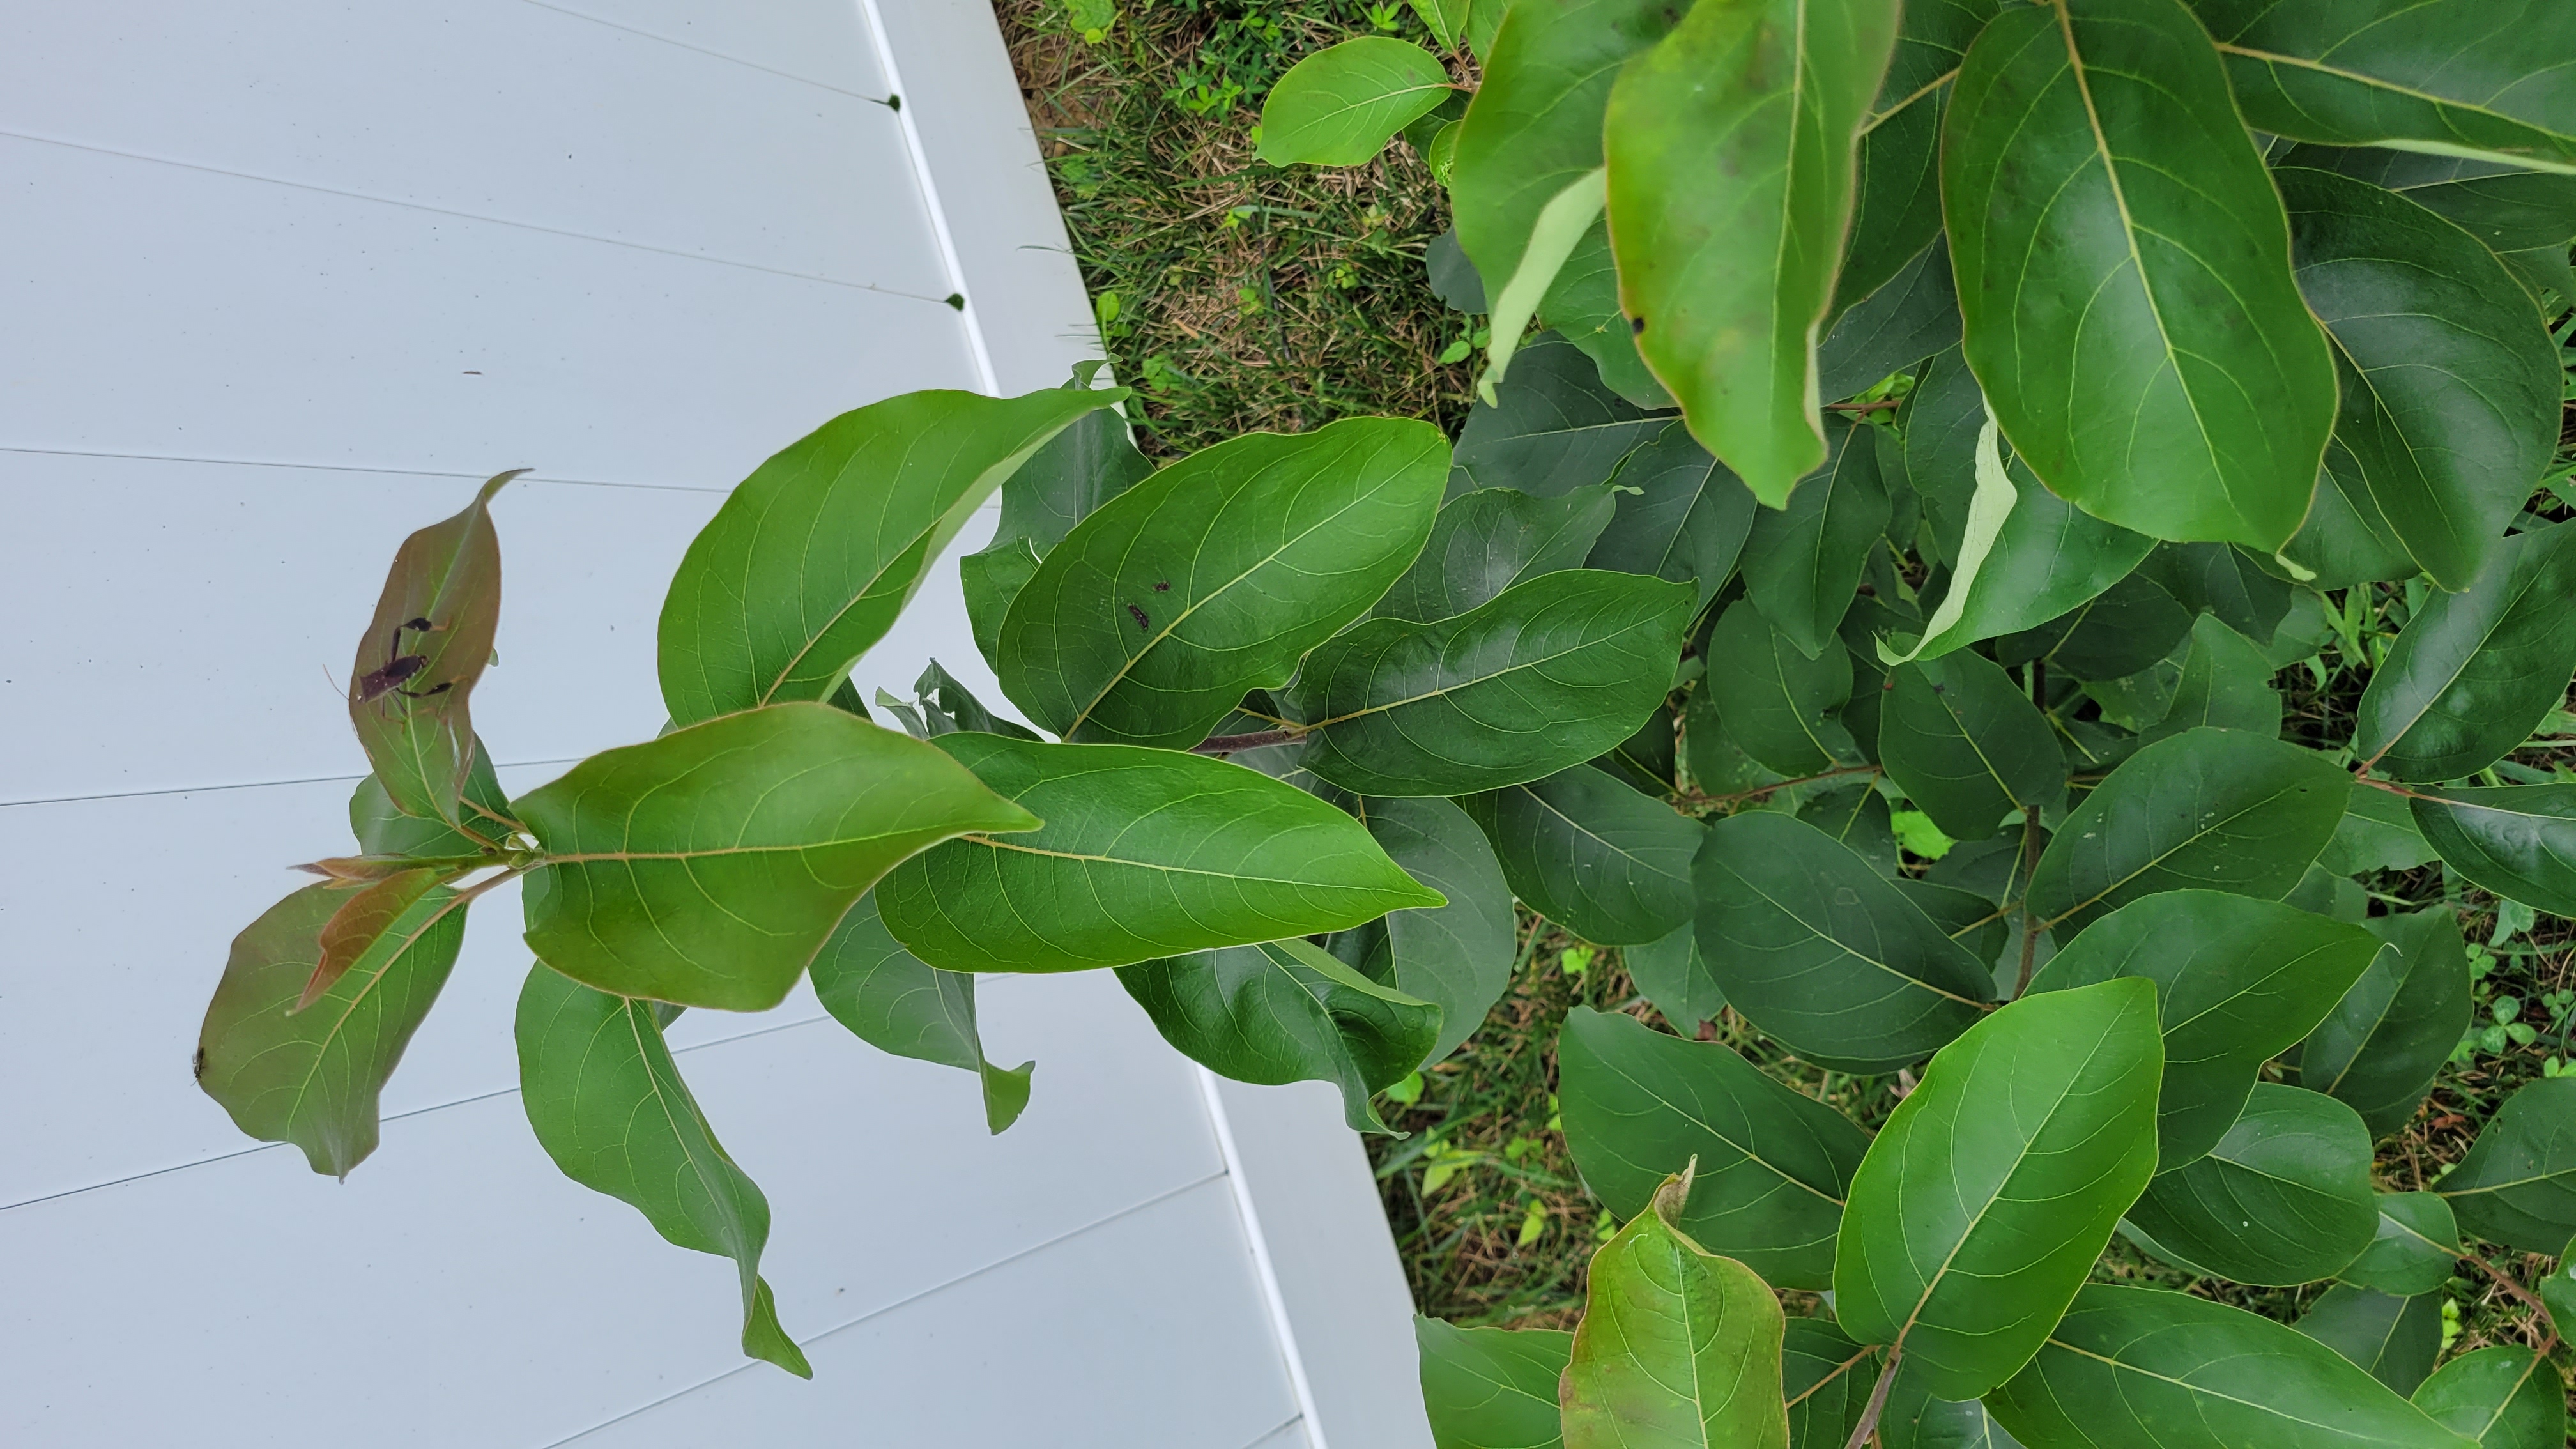
Identification note: The plant in the photo most closely resembles a young pear tree (Pyrus communis). It displays the key traits you’d expect from a pear sapling: a woody, upright growth habit with slender shoots, glossy, simple leaves that are oval to oblong with a pointed tip, and a distinct pale midrib with lighter secondary veins. New growth at the shoot tips often appears bronze or reddish before maturing to green. The leaf margins appear finely serrated when examined closely, which is typical of many pear cultivars. While it is impossible to be absolutely certain without seeing mature fruit, blossom characteristics, or closer bark details, the overall combination of leaf shape, venation, texture, and flush color strongly supports pear as the likely identification. If you want to confirm, you could wait for flowering or fruiting, or consult a local extension service with photos and, ideally, a sample of bark or leaves. What this plant is and how it grows - Type: deciduous fruit tree (likely a pear) with a single-trunk or multi-branching form as it develops. - Leaves: simple, alternate, 2–4 inches long (roughly 5–10 cm), ovate to oblong with a pointed tip, smooth to slightly serrated margins, and a glossy dark green upper surface. The leaf veins are clearly visible, with a prominent midrib and lighter secondary veins. - New growth: flushes of new leaves often arrive with a reddish or bronze tint in spring, then turn green as they mature. - Size and form: as a young tree, expect a central leader or a multi-branched stem system. With proper pruning and training, you can shape it into an open-center (central leader) or other form suitable for home gardens. - Bark and branches: on a young tree the bark is smooth and brownish; as it matures it darkens and may develop lenticels or small horizontal markings. The plant in the photo appears to be in the early to middle stage of development, with multiple leafy shoots emerging from near ground level and rising upward. Important note for gardeners: if you don’t see flowers or fruit, you can still care for it as a young pear tree. Pears require several seasons to establish flowering, and many cultivars benefit from cross-pollination with a compatible pear variety nearby. If you only have one tree, check the cultivar’s pollination requirements; some are self-fertile, while others set fruit best with a pollinator nearby. General care overview (summary) - Sun and location: Pear trees perform best with full sun (at least 6–8 hours of direct sun daily). A sunny site improves fruit set and ripening, helps reduce disease pressure, and promotes strong, well-formed growth. - Soil: well-drained, fertile soil is ideal. Pears tolerate a range of soil types but prefer loamy soil with good drainage. They do not like soggy conditions, which can lead to root rot and other problems. A slightly acidic to neutral pH (roughly 6.0–7.0) is common for pear trees. - Watering: establish a regular watering routine, especially during dry periods in spring and summer. Deep, infrequent watering encourages deep rooting and reduces disease risk from water splash. In established landscapes, aim for about 1 inch (2.5 cm) of water per week during dry spells, adjusting for rainfall and soil type. - Mulching: apply a 2–4 inch (5–10 cm) layer of organic mulch around the base of the tree, keeping mulch a few inches away from the trunk to prevent collar rot. Mulch helps retain soil moisture, regulate temperature, and suppress weeds. - Fertilizing: pears are relatively heavy feeders. Apply a balanced fertilizer (for example, a 10-10-10 formulation) in early spring as growth starts, following label instructions. Avoid over-fertilizing, which can lead to excessive vegetative growth at the expense of fruiting. A soil test can guide you to adjust fertilization and amendments (including micronutrients). - Pruning and training: proper pruning shapes the tree, improves air circulation, and reduces disease risk. In early years, focus on establishing a strong scaffold and desired shape. Remove any crossing or inward-growing branches, keep a central leader (or open-center framework if you prefer a different form), and prune to promote light penetration. Remove suckers from the base and any unhealthy wood. Pruning is typically done in late winter while the tree is dormant, with a lighter maintenance trim after fruit set in summer. - Pest and disease management: pears face several pests and diseases, notably pear psylla, aphids, codling moth, and fire blight (Erwinia amylovora). Fungal diseases such as pear scab (Venturia pirina) and powdery mildew can also occur. Practices to reduce risk include proper pruning for air circulation, removing fallen leaves and diseased wood, applying appropriate organic or conventional pesticides when needed, and monitoring regularly for signs of trouble. Prophylactic measures, such as sanitation in autumn and choosing resistant varieties where possible, help minimize problems. - Pollination and fruiting: many pear varieties require cross-pollination from another pear cultivar for best fruit set. Check your cultivar’s pollination requirements and plant a compatible partner within 50–100 feet (15–30 meters) if possible. Some newer cultivars are self-fertile, but even in those cases, cross-pollination can improve yield and fruit quality. - Harvest and storage: pears typically ripen after harvest rather than on the tree. Pick them when they reach full size and color but still firm; they should ripen off the tree at room temperature for several days to a week, then be stored in a cool environment (refrigeration slows spoilage). Gently check for ripeness by slightly pressing near the stem; if yields give a slight yield, they are ready to ripen indoors. Detailed care guidelines 1) Planting site and soil preparation - Choose a sunny site with well-drained soil. If your soil is heavy clay or tends to stay wet, improve drainage by amending with organic matter and, if feasible, plant on a slight mound or raised bed. - Before planting, test the soil pH. If the pH is too acidic or alkaline for pear preferences, you can amend accordingly (e.g., lime to raise pH modestly, sulfur to lower pH). Incorporate compost or well-rotted manure to improve soil structure and fertility. - If you’re transplanting a nursery tree, ensure the root ball is moist when you plant, spread the roots gently, and plant at the same depth as it was in the container. Water thoroughly after planting to settle the soil around the roots. 2) Watering strategy - Establish a deep watering routine for the first growing season to help root development. A slow, deep soak every 7–10 days is typically sufficient, increasing frequency during drought periods. - In hot, windy conditions, you may need to water more often, but aim for water reaching the root zone rather than surface moisture. Avoid waterlogging, which can promote root rot and fungal disease. - Mulch helps maintain consistent moisture and temperature around the root zone. Keep mulch several inches away from the trunk to prevent collar rot and pest harborage. 3) Fertilization and nutrition - In early spring, as growth resumes, apply a balanced fertilizer according to product directions or soil test results. Split heavier applications across early spring and early summer if needed, avoiding late-season fertilization that can promote late growth susceptible to frost damage. - For young trees, avoid over-fertilizing in the first 1–2 years; focus on creating a strong root system and healthy structural growth rather than rapid vegetative expansion. - If you observe yellowing leaves or poor growth, a soil test can help determine deficiencies (e.g., iron, nitrogen, or micronutrients) and guide targeted amendments. 4) Pruning and training details - Winter pruning (while dormant) helps shape the tree and remove dead or diseased wood. For a central-leader form, select a dominant main trunk and remove competing leaders; for an open-center form, you’ll prune to establish 3–5 main scaffold branches with good spacing. - Summer pruning can help balance growth and fruit load. Remove vigorous shoots (water sprouts) and prune back shoots that are shading fruiting wood to improve light exposure. - Always sanitize pruning tools between cuts if you’re dealing with diseased wood to reduce the spread of pathogens. 5) Pest and disease prevention - Fire blight is a particular concern in pears. To reduce risk, practice good sanitation (remove infected shoots, prune out cankers in dry weather), and avoid excessive nitrogen that promotes soft growth in wet springs. If symptoms appear (water-soaked, darkened shoots that bend downward), prune out affected wood at least 6–8 inches below the infected zone and dispose of debris away from your garden. - For fungal diseases like pear scab, apply appropriate fungicides if you notice characteristic spots or lesions on leaves or fruit. Improve airflow and sun exposure through pruning to reduce humidity around the canopy, which helps prevent disease. - Monitor for pests such as pear psylla, aphids, scale, and codling moth. Use pheromone traps, sticky traps, or targeted insecticides if populations are high. Beneficial insects and regular canopy care help keep pest levels down. 6) Pollination considerations - If you’re growing a pear variety that requires cross-pollination, plant a compatible pear cultivar within pollination distance (ideally within 50–100 feet). Good pollinators include other common European pear varieties. If you’re unsure whether your cultivar is self-fertile, check the variety’s documentation or ask a local nursery or extension agent. - Bee activity is essential for fruit set; avoid broad-spectrum insecticides during bloom that could harm pollinators. 7) Harvesting, storage, and usage - Pears are often harvested when full size is reached but while still firm. After picking, they should ripen at room temperature for several days to a week, depending on variety, then can be refrigerated to slow further ripening. - Use pears in salads, desserts, or canning; many varieties store well for several weeks to months when properly refrigerated. If you’re growing fruits for baking, select varieties known for their texture and flavor when fully ripe. Potential issues to watch for in home gardens - Leaf scorch or chlorosis can stem from inconsistent watering or nutrient deficiencies. Ensure a steady moisture supply and consider a soil amendment if leaves show yellowing between veins. - Leaf spots or powdery mildew may signal fungal issues; prune for air circulation and apply appropriate fungicides if needed, following label directions. - Nutrient imbalances can lead to poor fruit set or small fruit. A soil test helps tailor fertilization to your site’s needs. Bottom line If you have a young, upright plant with glossy, oval leaves and a spring flush that can appear reddish, a pear tree is a plausible identification. Care involves providing full sun, well-drained soil, consistent moisture, and a plan for pruning, pest and disease management, and pollination needs. With proper establishment and care, a pear tree can become a productive fruit tree in your landscape, offering a reliable crop of fruit for several years once maturity is reached. If you’d like, I can tailor a care plan to your local climate zone, soil type, and whether the tree is in-ground or in a container.
식별 시간
2025년 8월 23일
안내
식집사의 기능은 AI를 사용하고 있어 부정확 할 수 있습니다. 단순 재미와 참고용으로만 사용해주세요.
식물 결과에서 바로 할 수 있는 일
이름을 확인한 뒤 공식 식물 DB에서 관리 정보를 바로 확인하세요.