Diagnosis Result
Description
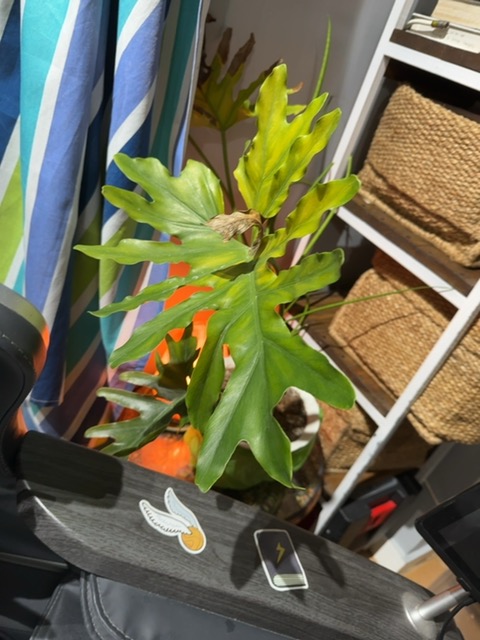
The plant shows yellowing lower leaves with brown tips and general droop, which is commonly caused by overwatering and poor drainage leading to root rot. In indoor settings, this can be exacerbated by soggy soil, low airflow, and high ambient humidity that slows evaporation. When roots rot, they cannot take up water and nutrients effectively, causing the foliage to yellow and soften. The pictured variegated, lobed leaves resemble a philodendron/bipinnatifidum type; these plants prefer a well-draining mix and consistent but not soggy moisture. If not addressed, rot can spread to more roots and stifle new growth. Diagnosis by image remains approximate; physical root inspection is essential to confirm and guide treatment.
Solution
1. Immediate remediation and root-system salvage: Start by carefully removing the plant from its pot to inspect the roots. Healthy roots are white or pale and firm; rotten roots turn dark brown/black, become mushy, and often emit a sour odor. Using clean, sharp scissors or pruning shears, trim away all rotted tissue back to healthy tissue. Do not leave any remaining mushy parts. Gently shake off soil and rinse the remaining roots with lukewarm water to remove soil particles and reveal the full extent of damage. Disinfect tools with isopropyl alcohol between cuts to prevent spread. Prepare a clean pot with drainage holes and a fresh, well-draining potting mix (for philodendrons, a blend of 2 parts high-quality potting soil, 1 part perlite or pumice, and 1 part orchid bark or coconut coir provides air and drainage). Replant the plant with the crown at soil level—not too deep—and avoid compacting the media around the roots. Water lightly after potting to settle the mix, then allow the top 2–3 cm of soil to dry before the next irrigation. Place the plant in bright, indirect light and maintain steady temperatures between about 65–75°F (18–24°C). Do not let the plant sit in standing water; use a pot with good drainage and empty the saucer if moisture accumulates. Consider applying a label-safe fungicide only if a fungal pathogen is strongly suspected or confirmed; follow label directions exactly. Monitor closely for new growth over the next 2–4 weeks; new white roots and fresh green shoots indicate recovery. If significant rot was extensive, be patient—regrowth may be slow but usually occurs with adherence to improved watering and drainage. 2. Long-term cultural care and prevention: After addressing the immediate rot, establish a care routine that prevents recurrence. Watering should be thorough but infrequent; a good rule is to water when the top 1.5–2 inches (3–5 cm) of the soil are dry to the touch. Use room-temperature water and ensure the pot has drainage holes; never let the plant sit in a drainage tray with standing water. Employ a well-draining substrate as described above and consider repotting every 1–2 years or sooner if the mix breaks down and compacts. Provide bright, indirect light—avoid direct sun, which can scorch new leaves and stress the plant further. Maintain humidity around 40–60%, which supports philodendron foliage without creating a perpetual damp environment. Fertilize sparingly during the growing season (every 4–6 weeks) with a balanced, water-soluble fertilizer diluted to half strength; discontinue fertilizer if growth slows or yellowing occurs, then reassess. Regularly remove yellowing or damaged leaves to reduce energy drain and improve photosynthesis. Inspect for pests such as spider mites, mealybugs, or scale; treat promptly with insecticidal soap or horticultural oils if detected. Ensure good air circulation around the plant and avoid cold drafts or sudden temperature changes. Consistency in watering, drainage, light, and humidity will dramatically reduce the risk of recurrent rot and support healthier, faster growth. 3. Propagation and recovery options if the main plant remains compromised: If the root system was severely affected, salvaging the plant through cuttings can save you a new, thriving specimen. Select a strong, disease-free stem with at least one node and several healthy leaves. Use sterilized scissors to cut below the node and remove lower leaves to expose the node. Place the cutting in a clean medium that maintains moisture without becoming soggy—perlite or sphagnum moss works well for initial rooting, or root in a small amount of water with the same sterile technique. Provide high humidity (a plastic propagator or a clear plastic bag with ventilation) and bright indirect light. Check the cutting every few days for root formation; once roots are 1–2 inches long, transplant into fresh potting mix in a small pot with drainage. Gradually acclimate to normal indoor conditions and resume the care routine described above. If you prefer, you can also attempt air-layering on a healthy branch to propagate a new plant while the parent continues to recover. In all propagation efforts, sanitize tools between cuts, avoid contaminating healthy tissue, and discard any cuttings that show signs of decay. With careful technique and consistent care, you can recover or replace your plant while minimizing disease recurrence.
Notice
The function of Plantypia is using AI, so it may be inaccurate. Please use it for fun and reference only.
Check with official pest context
Leaf spots and wilting can come from watering, temperature, or season changes as well as pests.